
Last Update: January 29, 2025
BY eric
eric
Keywords
How to Generate Images with AI Models on Your Own Computer
Introduction
AI-generated images have revolutionized the creative industry, enabling anyone to create stunning visuals without requiring advanced artistic skills. While many online services offer AI image generation, running models on your own computer gives you greater control, privacy, and flexibility, and it is totally free.
This guide will walk you through the process of setting up and using AI models for image generation locally. Whether you're an artist exploring AI-assisted creativity or a developer integrating AI into your projects, you'll learn how to install the necessary software, choose the right models, and generate images efficiently on your machine.
Setting Up Your Environment
Before running AI models, you need to set up your system properly.
Hardware Requirements
- GPU – A dedicated GPU (NVIDIA recommended) with at least 8GB VRAM for efficient performance.
- RAM – At least 16GB RAM is recommended, though some models may work with less.
- Storage – AI models can be large (2GB–10GB per model). Ensure you have sufficient SSD storage.
If you want to run a particular model you desired, which might require a lot of VRAM, make sure that the GPU has enough VRAM.
Software Requirements
Operating System
While you can use run AI models on all main operating systems including Windows, MacOS and Linux. This guide will cover running AI models on only Ubuntu or other Linux distributions.
Installing Python and Dependencies
- Install Python (3.8 or later)
sudo apt install python3
sudo apt install python3-venv
sudo apt install python-is-python3
- Initialize Virtual Environment:
You may need gnome-terminal to run the commands.
python -m venv ai-env
source ai-env/bin/activate
- Install Dependencies
pip install torch torchvision torchaudio
pip install diffusers
pip install transformers
pip install accelerate
pip install sentencepiece
- Install Hugging Face Hub
pip install huggingface-hub
For logging in to Hugging Face, you will need to have a Hugging Face account. If you don't have one, you can create one here: https://huggingface.co/join.
- Installing git
apt install git git-lfs
This is required for downloading the model.
Choosing AI Models
There are many AI models available for image generation, but some of the most popular ones are listed below.
Popular AI Models for Image Generation
- Stable Diffusion – High-quality text-to-image model.
- DeepFloyd IF – Advanced diffusion model for detailed images.
- SDXL – Improved version of Stable Diffusion for higher resolution.
Text-to-Image vs Image-to-Image Models
- Text-to-Image – Create images from text prompts.
- Image-to-Image – Modify or enhance existing images using AI.
Where to Download Pre-Trained Models
- Hugging Face (huggingface.co) – Hosts various AI models.
- CivitAI (civitai.com) – Community-driven model sharing.
- GitHub – Open-source repositories for AI tools.
Pre-trained Models
In this guide, we will demonstrate how to use text-to-image models and download pre-trained models from Hugging Face (huggingface.co). Please note that compatibility depends on your hardware specifications, as some models may require more VRAM and RAM than your machine can support.
The pre-trained models we will be testing are:
Running AI Models Locally
Download the Pre-trained Models
We might need to create a directory where we will download the models.
mkdir -p /data/ai/huggingface
cd /data/ai/huggingface
Download small-stable-diffusion-v0
git-lfs clone https://huggingface.co/OFA-Sys/small-stable-diffusion-v0 OFA-Sys/small-stable-diffusion-v0
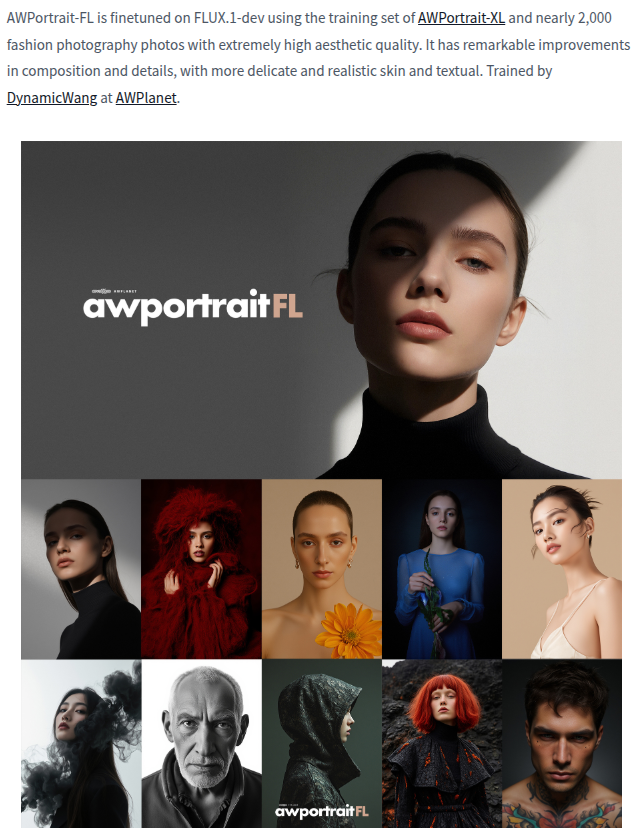
Download AWPortrait-FL
If you have a NVIDIA 3090/4090/5090 GPU, you can try this model.
git-lfs clone https://huggingface.co/Shakker-Labs/AWPortrait-FL Shakker-Labs/AWPortrait-FL
Download FLUX.1-dev
To save memory, when using AWPortrait-FL, we will need FLUX.1-dev too. In order to download this model, you will need to login to Hugging Face and accept the license: https://huggingface.co/black-forest-labs/FLUX.1-dev. Please refer to the instruction for access token generation. After you have the access token, then you can login to Hugging Face with the following command:
# Input your access token when you see the prompt
# you can get it from https://huggingface.co/settings/tokens
huggingface-cli login
# you may see a warning message from git about credentials store
# if you see this warning, you will need to run the following command
# git config --global credential.helper store
# re-login
# huggingface-cli login
git-lfs clone https://huggingface.co/black-forest-labs/FLUX.1-dev black-forest-labs/FLUX.1-dev
Since these models are huge, downloading them might take a while. If you're in Australia, well… grab a coffee, binge a whole TV series, maybe even take a nap—or three. Just start the download, go about your life, and check back tomorrow.
Why did the Aussie try to download an AI model at home? Because they wanted to experience what life was like before the fast internet existed! 🚶♂️🐢
Running AI Models Locally
Running small-stable-diffusion-v0
Go the directory where you downloaded the model.
cd /data/ai/huggingface
Create a python script file called test-small-stable-diffusion-v0.py:
import torch
from diffusers import StableDiffusionPipeline
model_id = "OFA-Sys/small-stable-diffusion-v0"
pipe = StableDiffusionPipeline.from_pretrained(model_id, torch_dtype=torch.float16)
pipe = pipe.to("cuda")
prompt = "a pig, 4k"
image = pipe(prompt).images[0]
image.save("pig.png")
You can use any text (code) editor to edit the script. And if you would like to change the prompt, you can change the text between the double quotes.
Run the script.
python test-small-stable-diffusion-v0.py
Now we have a pig image in pig.png.
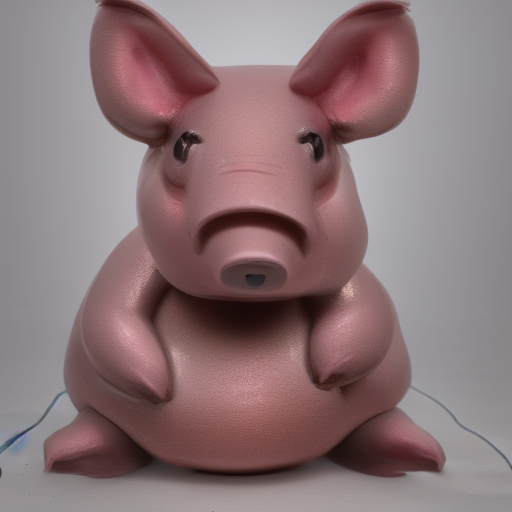
Not very impressive, is it? Because we are using a very small model. But we can try to use a bigger model to generate a better image.
Running AWPortrait-FL
If your GPU has enough VRAM, you can try this model.
cd /data/ai/huggingface
Create a python script file called test-awportrait-fl.py:
import os
import torch
from diffusers import FluxPipeline
os.environ['CUDA_VISIBLE_DEVICES'] = '0'
pipe = FluxPipeline.from_pretrained("black-forest-labs/FLUX.1-dev", torch_dtype=torch.bfloat16)
pipe.load_lora_weights('Shakker-Labs/AWPortrait-FL', weight_name='AWPortrait-FL-lora.safetensors')
pipe.fuse_lora(lora_scale=0.9)
pipe.to("cuda")
prompt = "close up portrait, Amidst the interplay of light and shadows in a photography studio,a soft spotlight traces the contours of a face,highlighting a figure clad in a sleek black turtleneck. The garment,hugging the skin with subtle luxury,complements the Caucasian model's understated makeup,embodying minimalist elegance. Behind,a pale gray backdrop extends,its fine texture shimmering subtly in the dim light,artfully balancing the composition and focusing attention on the subject. In a palette of black,gray,and skin tones,simplicity intertwines with profundity,as every detail whispers untold stories."
image = pipe(prompt,
num_inference_steps=24,
guidance_scale=3.5,
width=768, height=1024,
).images[0]
image.save(f"example.png")
python test-awportrait-fl.py
Unfortunately, this model cannot work on my computer because I do not have enough VRAM on my GPU. But you can see the result generated by the model author.
Common Issues
A most common issue will be "CUDA out of memory". This is most likely because the VRAM is not enough. You can try to reduce the resolution of the image, or reduce the guidance scale. And if you are trying models that is different from shown above, you may want to try another model to see if it works. If you are testing the "small-stable-diffusion-v0" model and you are encounter this issue, you may want to try a different GPU.
Latest Articles
cTrader FIX API: Which Brokers Say Yes to Retail Traders?
February 18, 2026

Router Down! My 3-Day Battle with Meraki, Ubiquiti & VLANs
February 10, 2026
RDP 'Please Wait' Black Screen? A Simple Fix
February 10, 2026

China & Japan at a Glance: Cashless Futures and Electric Cars
January 19, 2026
React2Shell: Critical RCE Flaw in Next.js & How to Fix It
December 8, 2025
Previous Article
Next Article
Jan 25, 2025
Comments (0)
Leave a Comment