Last Update: January 15, 2025
BY eric
eric
Keywords
Introduction
In today's digital landscape, businesses often adopt a hybrid infrastructure that combines on-premises networks with cloud resources. This setup offers the flexibility to leverage the best of both worlds—retaining control over sensitive data and critical applications on-premises while taking advantage of the scalability, reliability, and advanced services provided by cloud platforms like Google Cloud.
A site-to-site VPN connection bridges these environments, enabling seamless communication between on-premises systems and cloud resources. This is essential for scenarios such as extending data centers, integrating cloud-native applications with legacy systems, or ensuring business continuity.
This post will outline the steps to create a site-to-site VPN connection between your on-premises network and Google Cloud with a Meraki router.
Network Setup
On-Premises Network
An Example of On-Premises Network Setup
Here is a diagram of the on-premises network setup:

In this setup, we use Meraki MX64W router as the gateway for the on-premises network. Meraki security appliance supports a great feature called Site-to-Site VPN, which allows you to establish a secure connection between your on-premises network and a remote site. In this case, we are connecting to Google Cloud. Meraki MX64W is a secure and reliable router that provides a robust network infrastructure for the on-premises network. However, this particular model is approaching end of life (EOL) and the highest firmware version available is 18.1.X (i.e. MX 18.107.10), so there are some limitations for what routing protocols it supports. For example, BGP is only supported in routed mode in version MX 18.207 or higher.

It is also worthy of mentioning that Meraki MX64W has a maximum throughput of 250 Mbps, and a maximum VPN throughput of 50 Mbps. Given that the internet service at the venue in the example above can only have 50 Mbps downstream and 30 Mbps upstream maximum, so the capacity of this device is enough to handle the maximum traffic.
If you have a more powerful Meraki device such as MX67, MX68, MX75, etc, you can use BGP routing protocol. You can have a look at all the available Meraki MX devices in the Meraki MX series here.
Google Cloud
Google Cloud's Virtual Private Cloud (VPC) network is a foundational service that enables businesses to build and manage isolated virtual networks within Google Cloud. VPCs provide a flexible and scalable framework for organizing resources, such as virtual machines, databases, and storage systems, across different regions and zones globally.
So an important benefit of using a cloud service like Google Cloud is that most basic network settings are pre-configured and easily adjustable through the dashboard. For example, when a virtual machine is created and it will be automatically assigned to a VPC network, it will have a private IP address and an optional public IP address, which is not accessible from the public internet by default.
Also with features like subnet-level control, custom IP address ranges, and advanced routing capabilities, a VPC network ensures secure communication between resources, whether they reside entirely in the cloud or span hybrid environments.
Connecting the network between on-premises network and Google Cloud
To connect to networks inside the Google Cloud, we can easily deploy a set of firewall rules to whitelist / blacklist the specific IP addresses deciding who can or cannot access the network. The limitation of relying on firewall rules alone is that they are not flexible enough to handle dynamic changes in the network topology. It will be the same but probably more complicated for the computing resources in the cloud to access the on-premises network. To access more than one devices inside the on-premises network, we might need to create lots of network rules such as rules for port forwarding to different devices. So a site-to-site VPN connection between on-premises network and Google Cloud is a better option in this scenario.
Creating a Site-to-Site VPN Connection
Google provides two types of VPN connections: High-availability (HA) VPN and Classic VPN. In this post we will only use classic VPN as our router does not support BGP routing. Also, HA VPN is more complex than Classic VPN, so we will not use it for now.
Creating a Cloud VPN Connection on Google Cloud
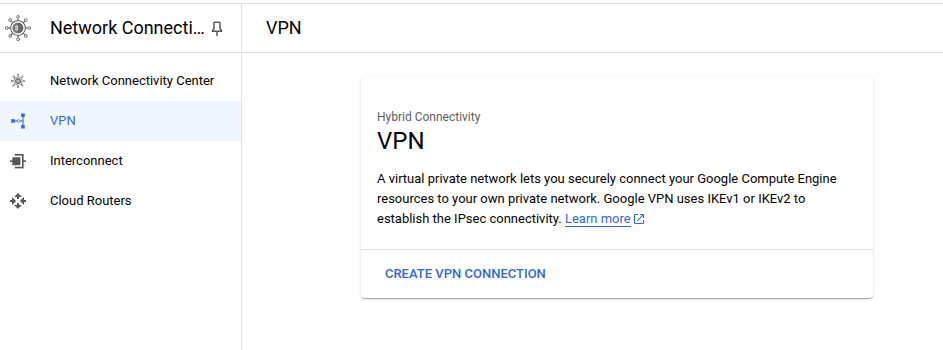
Go to the console of Google Could VPN creation page and create a new VPN connection.:
Select Classic VPN as the connection type.
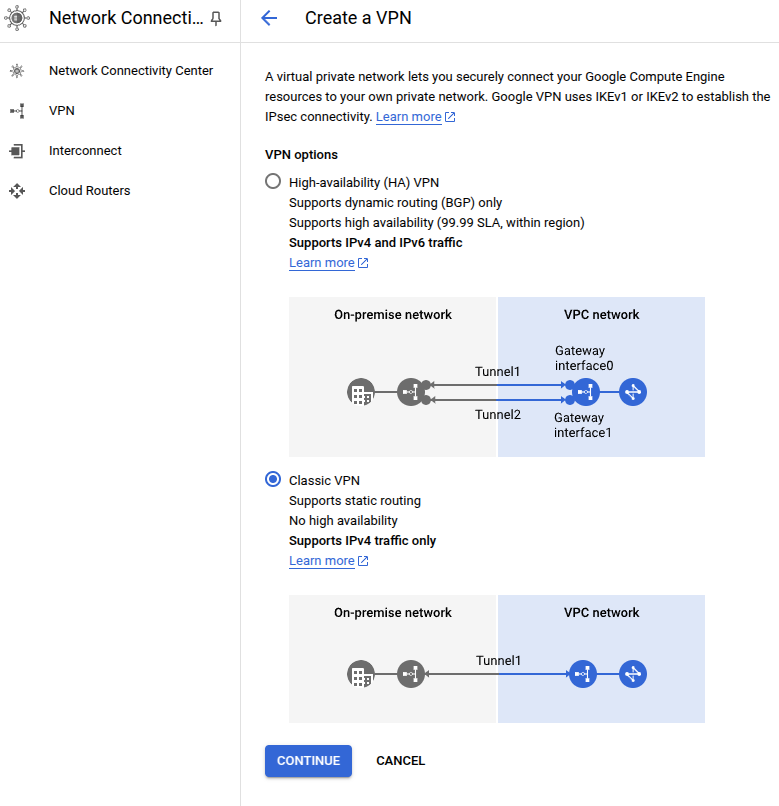
Click on Continue.
Now fill up the VPN gateway information:
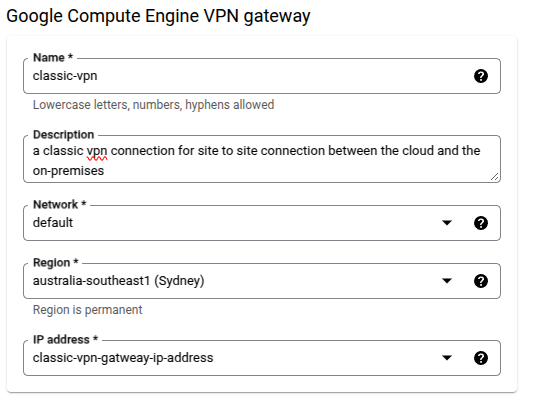
We need to reserve an IP address for the VPN gateway as well.
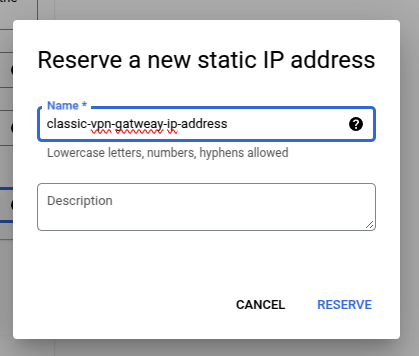
Next we need to create a tunnel between the on-premises network and Google Cloud.
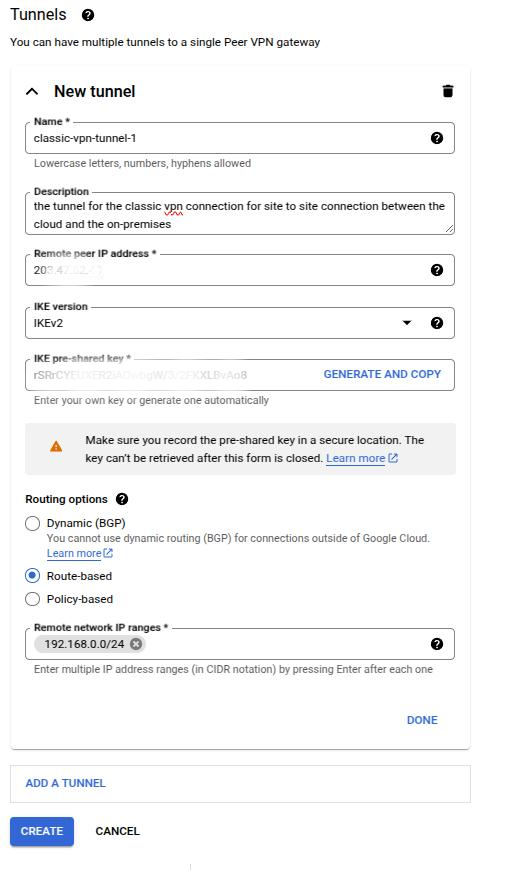
The remote peer IP address is the public static IP address of the on-premises network. You can find the address from Meraki dashboard through "Appliance Status" page.
We will use IKEv2 for IKE version, and Route-based for routing option. The remote network IP range is the IP range of the on-premises network, and you can also find it from Meraki dashboard through "Addressing & VLANs" page.

Then click on Create and wait for the creation to finish, and it may take a few minutes.

After it finishes, you can see the VPN gateway information with an public IP address (35.19x.x.x) which we will use to create a VPN peer on the Meraki dashboard.
Creating a VPN Peer on Meraki Dashboard
Now we will go to the Meraki dashboard and create a VPN peer. From "Security & SD-WAN" -> Configure -> "Site-to-Site VPN", we can create a new VPN peer.
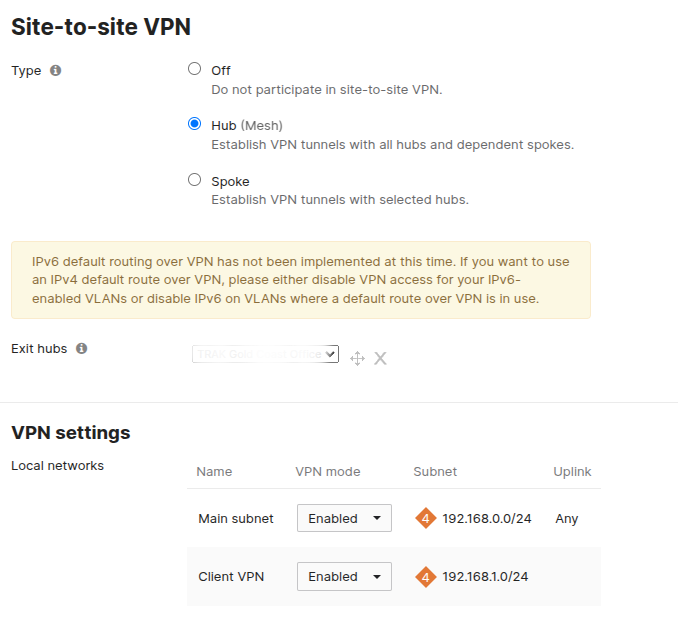
From there, we should select the Hub as the VPN type, and also enable the VPN mode for main subnet.
From Non-Meraki Peers, click on Add a peer.

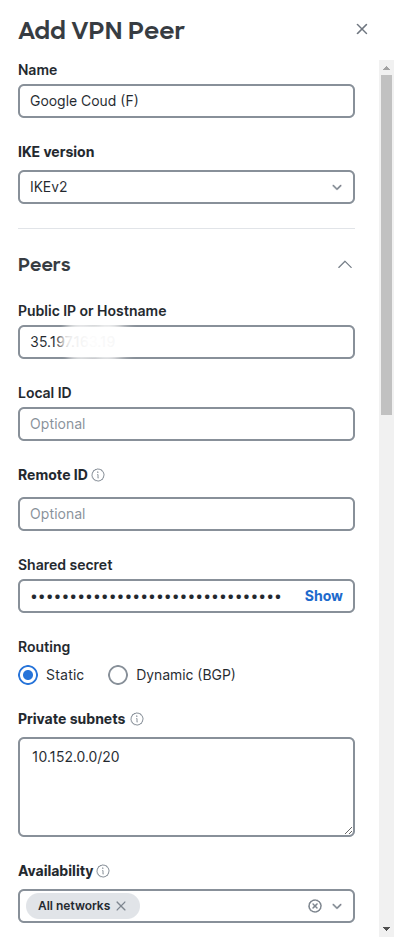
Then a side pane on the right will show up, and we can fill up the information.
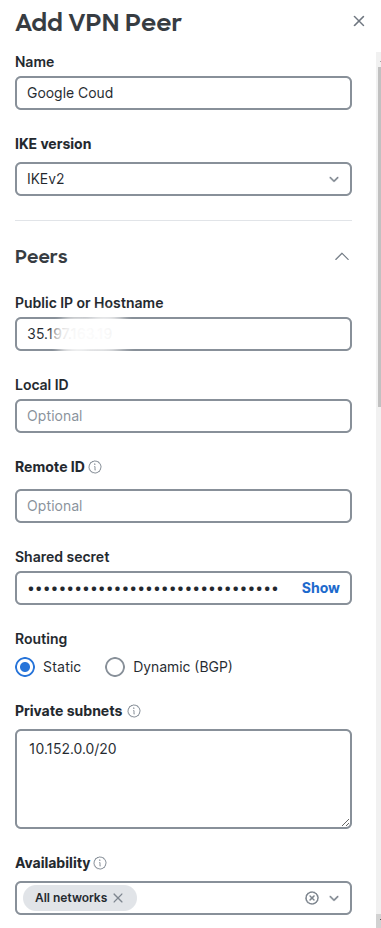
Make sure that we select the IKEv2 for IKE version, and on the Public IP Address or Hostname field of Peers section, we need to fill up the public IP address (35.19x.x.x) of the VPN gateway we created earlier.
For the Shared Secret, we need to fill up the shared secret of the VPN connection we created on Google Cloud too.
For Routing, We select Static, and in the Private Network, we fill up the IP range of Google Cloud's VPC network. For data center in Sydney, the default subnet is 10.152.0.0/20.
Please note that the subnet is 10.152.0.0/20 not 10.152.0.0/24, otherwise, the connection to the resource on Google Cloud will fail.
For the Availability, we select All netwrorks.
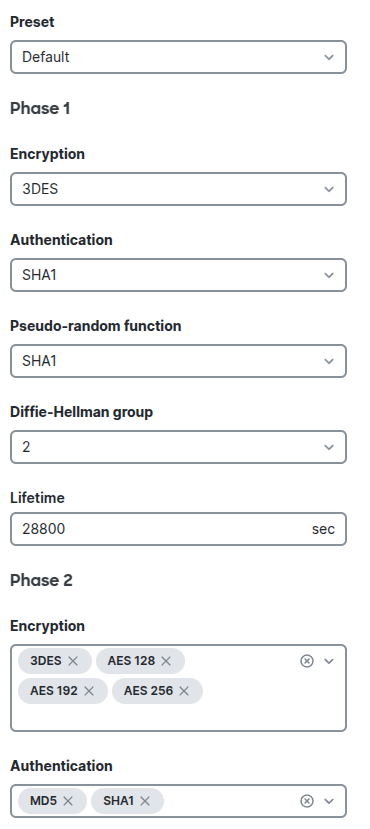
Next in the IPsec policy, we select Default for the Preset option. From the dropdown menu, we can there are options for AWS, Azure, Umbrella, Umbrella (Deprecated), Zscaler, and Custom, which means you can easily create a site-to-site VPN connection between on-premises network to other cloud providers such as AWS, Azure, etc.
And we will just leave other options as default.
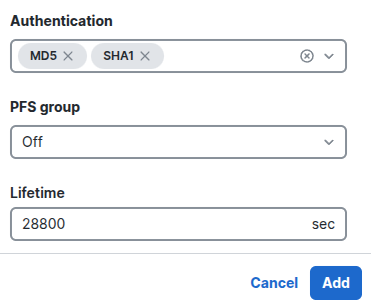
Click on Add.
Then you can see the connection has been created successfully. But don't forget to click on Save Change.

Now we need to check the connection status, from Organization -> Monitor -> VPN Status, we can see the connection status, and click on the network name to see the details.
Click on the 1 Non-Meraki Peers (could be any number depending on how many peers you have), and you can see the following information:

If the Status is green, which means the connection is working fine.
Last but not least, dont forget about the firewall rules for accessing the resources on Google Cloud.
Conclusion
Creating a classic site-to-site VPN connection between on-premises network to Google Cloud with Meraki router can be really easy now. We just need three set of key information:
- The public IP address of the router for the on-premises network and the public IP address of the VPN gateway on Google Cloud
- The shared secret of the VPN connection on Google Cloud
- The IP range of the VPC network on Google Cloud and the subnet of the on-premises network
By following these steps, you've successfully established a site-to-site VPN connection between your on-premises network and Google Cloud.
Remember to regularly review and update your network configuration to ensure optimal performance and security.
Previous Article

Jan 16, 2025
Safeguard Your Secret and Hide it in Plain Sight
This post discusses the importance of safeguarding your secret with a way of hiding it in plain sight.
Next Article

Jan 11, 2025
Solving Email Rejection Issue: 451 4.7.5 Temporary error evaluating DMARC policy
This post discusses how to solve an email rejection issue with 451 4.7.5 Temporary error evaluating DMARC policy.


